
Issue 25: Tips and Tricks For Prototyping With AI. Design Thinking Part 6/7
The actual AI prototyping workflow — tool order, build phases, and when Figma is in the workflow.

Happy Monday, designers!
I have been on so much needed holidays for 2 weeks, following intense and stressful month of May. And to make up for missing content - I am preparing more special issues for my paid and free subscribers - stay tuned!
A quick note before we get into it. The guide this newsletter feeds into — AI-Powered Product Design Workflows — gets its biggest update yet this month: a full Design Systems section, built from the same workflows I keep writing about and the ones I talked about during Tokyo Design Meetup. When it lands, the price goes from $15 to $20. I test new workflows every week, the guide keeps growing, tokens are used to deliver and publish the knowledge. This is why the price grows as well, but it is pay once -use forever (think of it as an investment).
So, without further ado, let’s talk about the next phase of Design Thinking - Prototyping.
Every second designer I follow is prototyping differently than they were two years ago. Fewer detailed screens for every state. Fewer Figma prototypes. More flows built directly in code, more AI in the loop earlier, more time spent on architecture and less on components.
That’s not laziness. It’s a signal.
I’ve been testing AI-native prototyping across different products - mainfeatures, a lot of states, a lot of decisions about what the prototype needs to actually test. Here’s what the workflow looks like now.
1. Start with information architecture, not a component library
The first thing I do when starting any new prototype isn’t open Figma. It’s map the skeleton — how the product thinks about itself and its users.
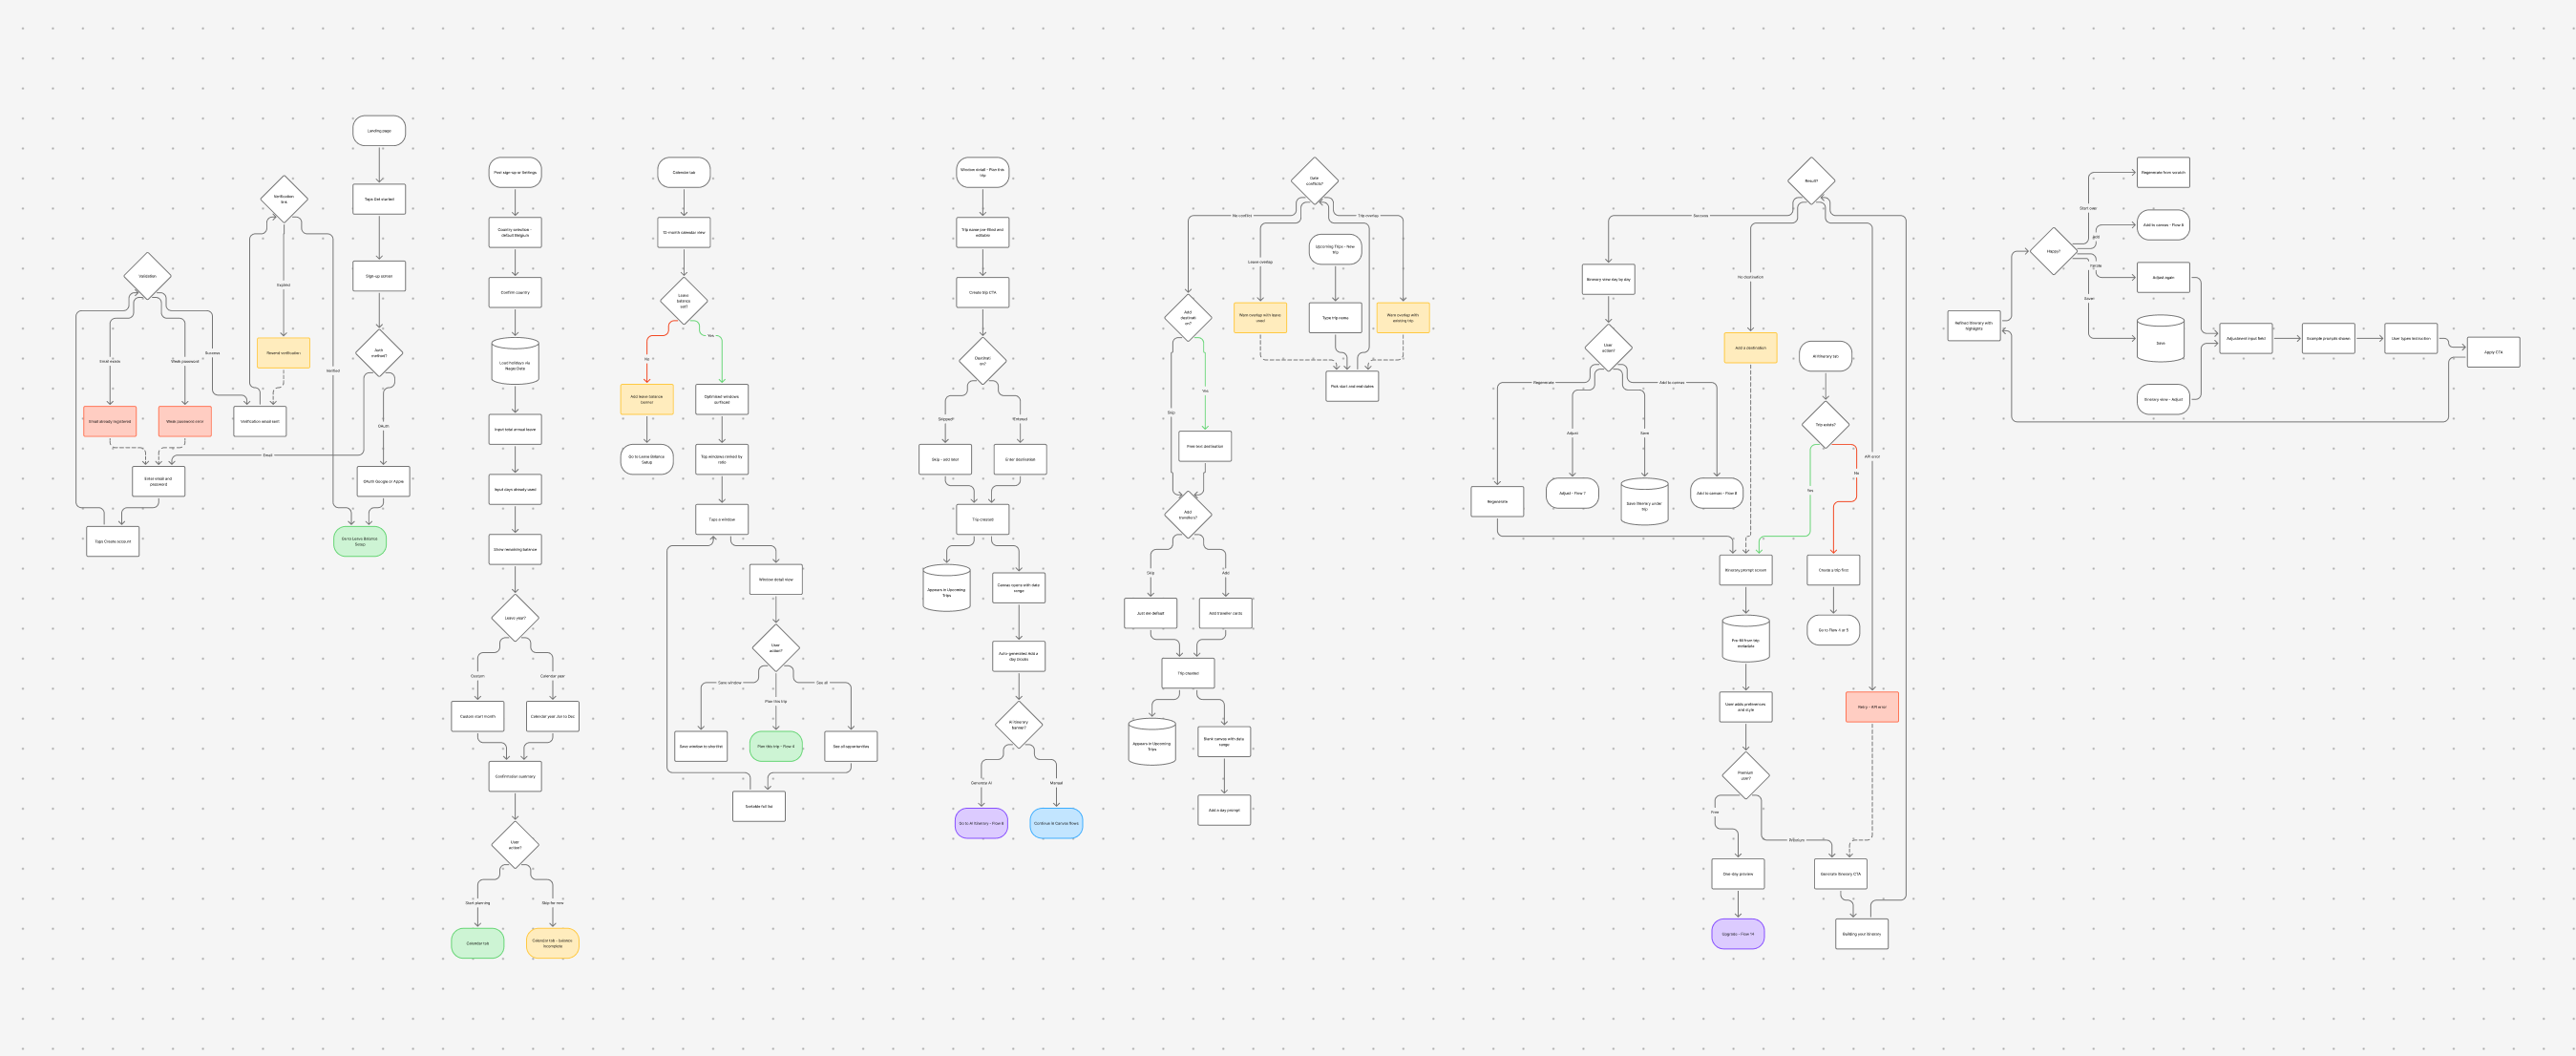
I use AI to generate user flows in FigJam. Not just navigation maps — the full logic underneath each step. What the user knows at this point. What the system knows. Where decisions branch. What data is available. The happy path and the ones underneath it.
